

Rather than typing to get the thing to move, you can also use the mouse. Note however that if you want to get into programming you will have to learn to type.
Note that this GUI is provided for low-level verification of the operation of the robot, and should not be used in any normal operational procedures; it will thrash the robot about, possibly shortening the life of the arm.
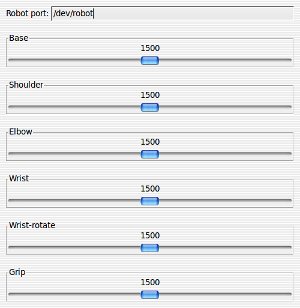
To use the mouse, type into a command window guile level-1-gui.scm, and on pressing the enter key you will have a window full of sliders. Try sliding something.
Notice that the port to which the robot is assumed to be connected is displayed at the top. If this is incorrect for your set-up you may change it here by typing a new port string. If you want to change the default (the value the GUI will show whenever it starts up), you must edit the level-1-gui.scm file, and find a line near the top which reads something like
If things are still not working, or not as expected, you may need to change the assignments of joints to motor connections on the control board. To do this, again edit the level-1-gui.scm file and near the end will be some lines like
If you run this program immediately after switching the robot on, you will see that the joints are limp until moved, and when they do move they will, at first, jerk into position. This is normal, and the issue is addressed in the Level 2 software layer.